Are you thinking about buying a wallet or do you already have one? Maybe you’re thinking about purchasing a physical wallet like Trezor or Ledger, but you’re not sure how to set it up. Well, I’ve got you covered! In this article, I’ll walk you through the step-by-step process of setting up a physical cryptocurrency wallet, whether it’s electronic or physical.
Table of contents
What is a cold wallet?
A cold wallet, also known as a cold storage wallet, is a type of cryptocurrency wallet that is mostly kept separate from the internet. This extra layer of security keeps it safe from potential hacks and cyber attacks. In fact, most cryptocurrency thefts occur in hot or electronic wallets, making it essential to choose a cold wallet to keep your digital assets more secure.
Types of cold wallets:
Paper wallets:
Think of paper wallets as a safe deposit box for your cryptocurrencies. They are completely offline and extremely secure. You can write down your keys on paper and store them carefully. But be careful, they are susceptible to damage from water or fire.

USB/Hardware Wallets:
These are electronic devices like Ledger or Trezor. They are connected only to make transactions, which reduces the risk of exposure. However, they can break or get damaged.
Software-based cold wallets:
Examples include Electrum and Armory. You can connect to the Internet for additional protection. Beware of viruses on your device, as they can be hacked.
Online cold wallets:
They are hot wallets that provide temporary cold wallet services. They are still vulnerable to hot wallet risks such as hacker attacks.
Non-electronic wallets:
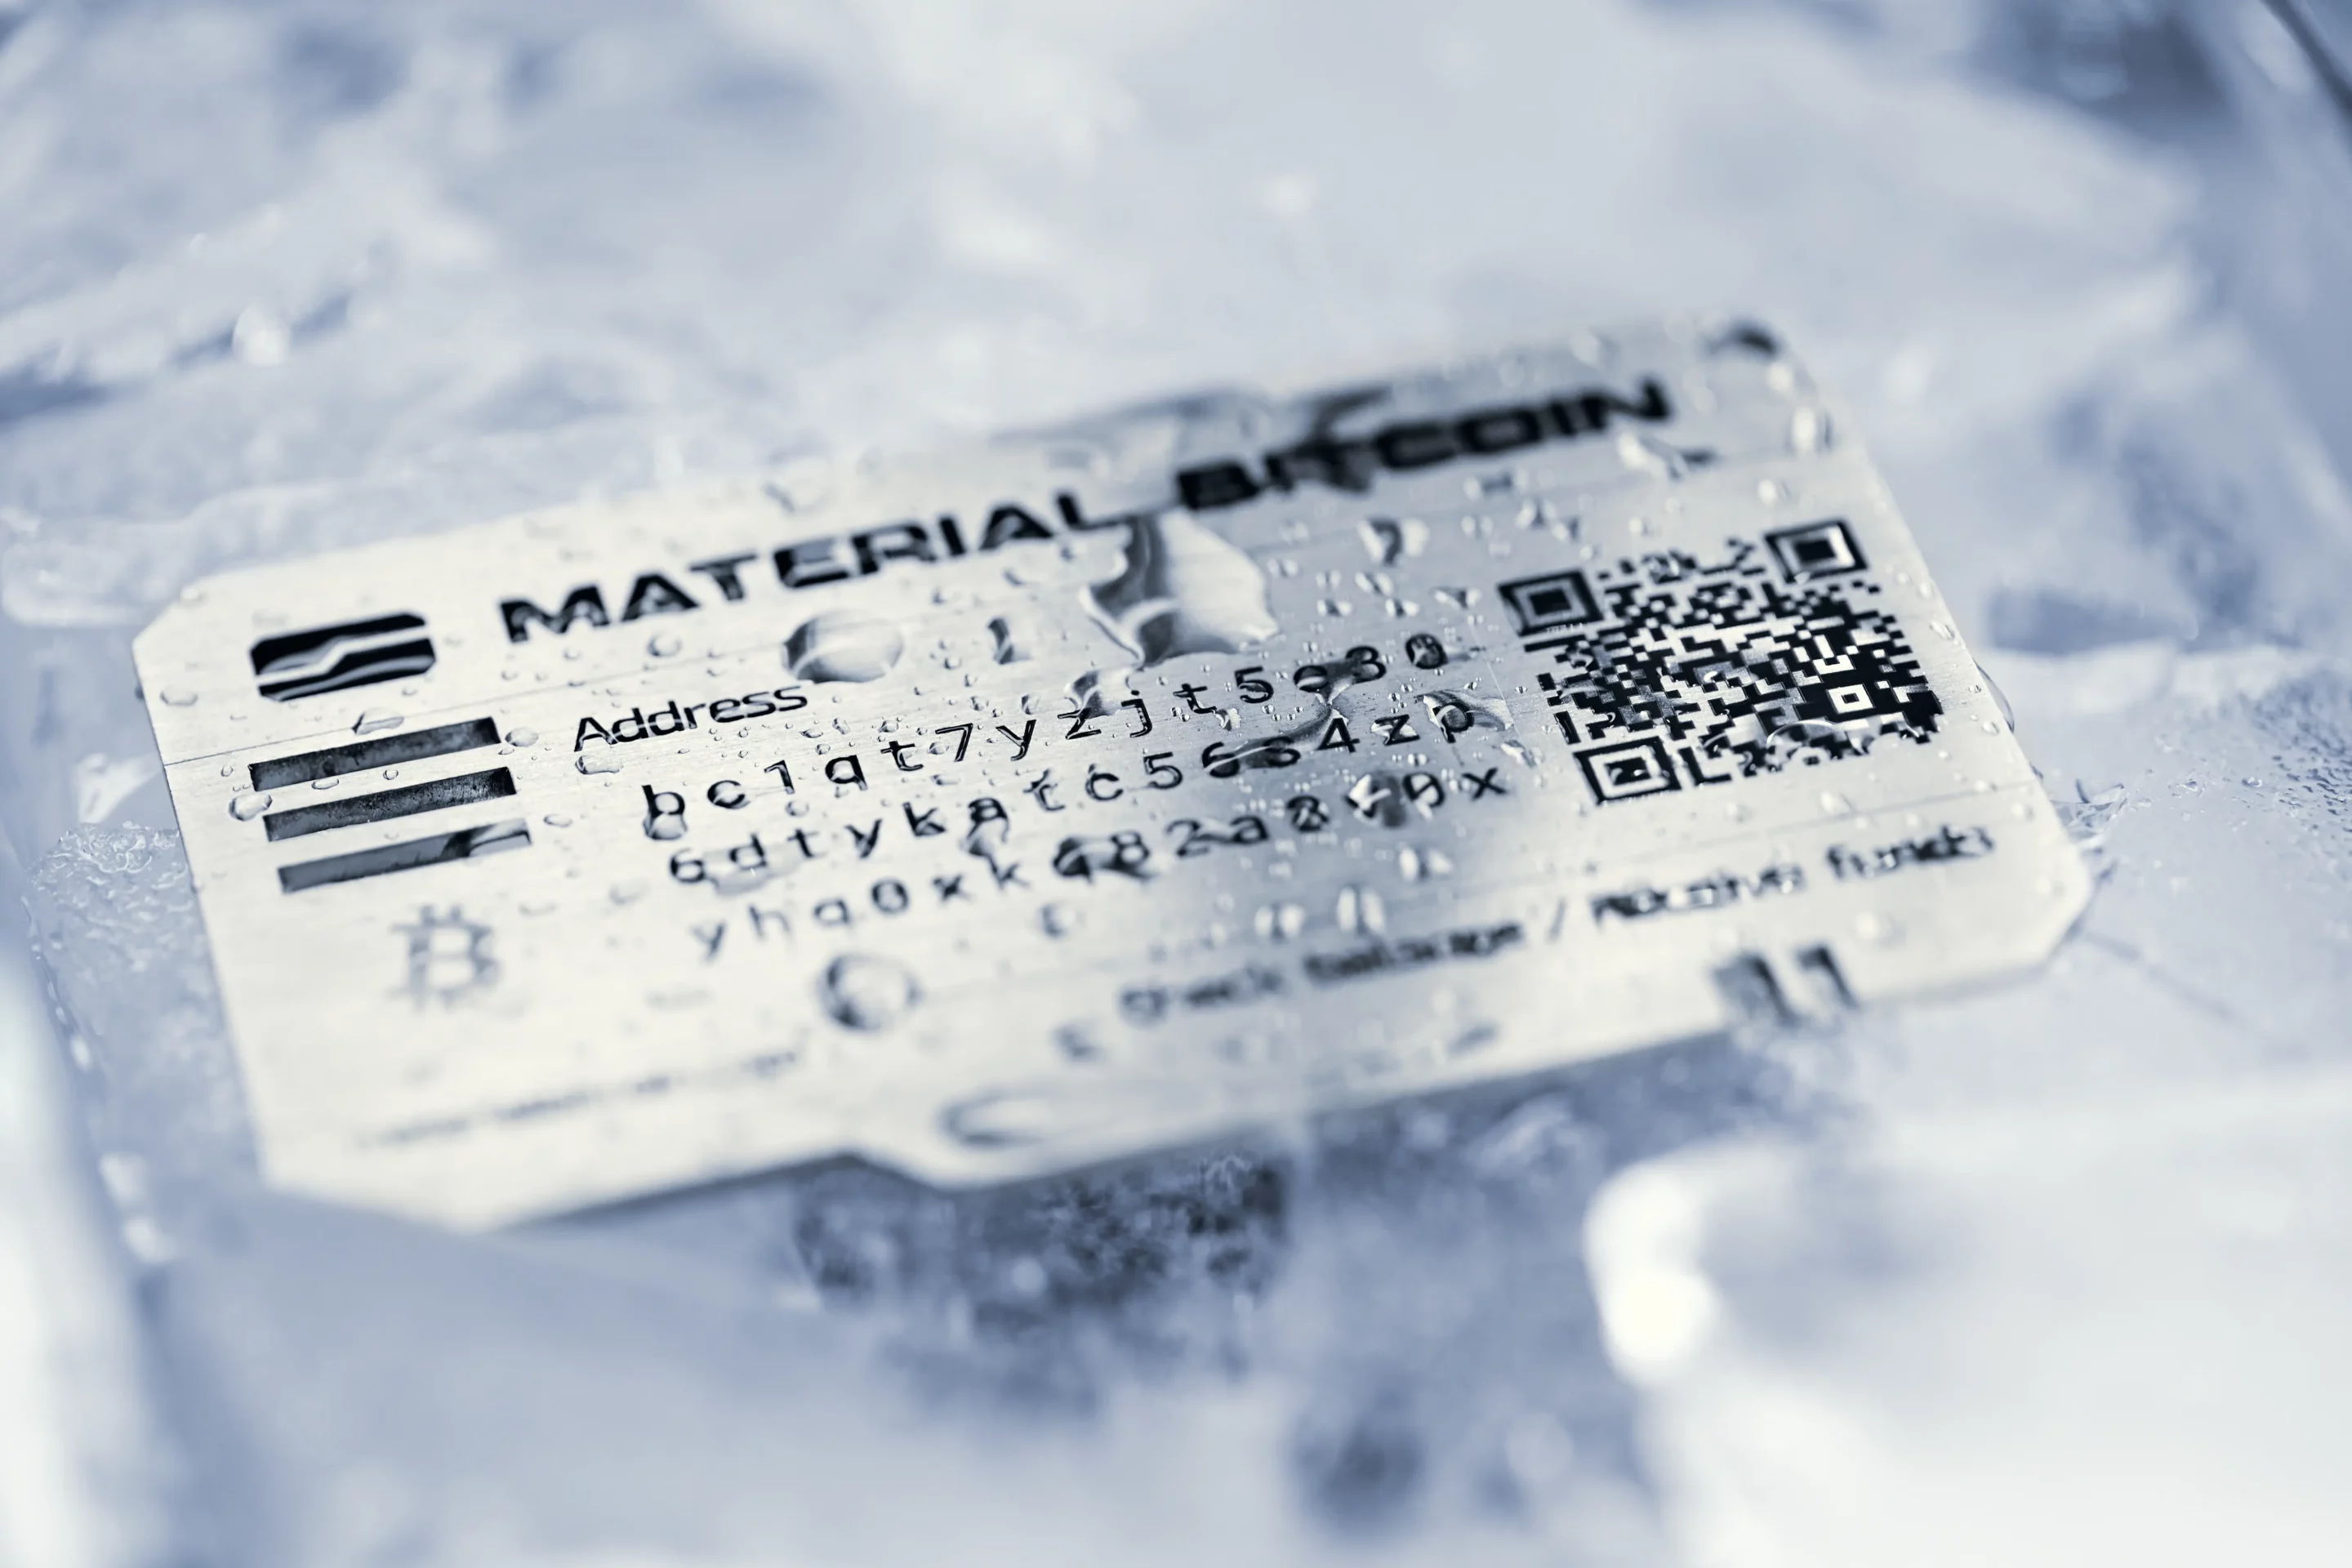
For example, material wallets. They do not contain electronic components and do not require an internet connection. They are very secure and resistant, and are not subject to technical failures or the risk of water or fire damage. They are without a doubt the safest and do not require any configuration. We will see why later.
How to Set Up Your Physical Wallet Step by Step
Note: We will see how to set up a hardware wallet. Non-hardware wallets will be covered below.
Step 1: Get your hardware wallet:
First, purchase your hardware wallet from the official website or authorized distributors. Make sure to receive a sealed and original package to ensure the safety of your device.
Step 2: Download the app or software:
Some hardware wallets like Ledger or Trezor require you to download a specific app or software to set up and manage your cryptocurrencies. Visit the official website of your e-wallet brand and make sure you download the appropriate version for your device. For example, the Ledger app is Ledger Live, which can be accessed here. You will need to choose your operating system.
Step 3: Connect your physical wallet:
Use the included USB cable to connect your physical wallet to your computer or mobile device. Follow the on-screen instructions to begin setup.
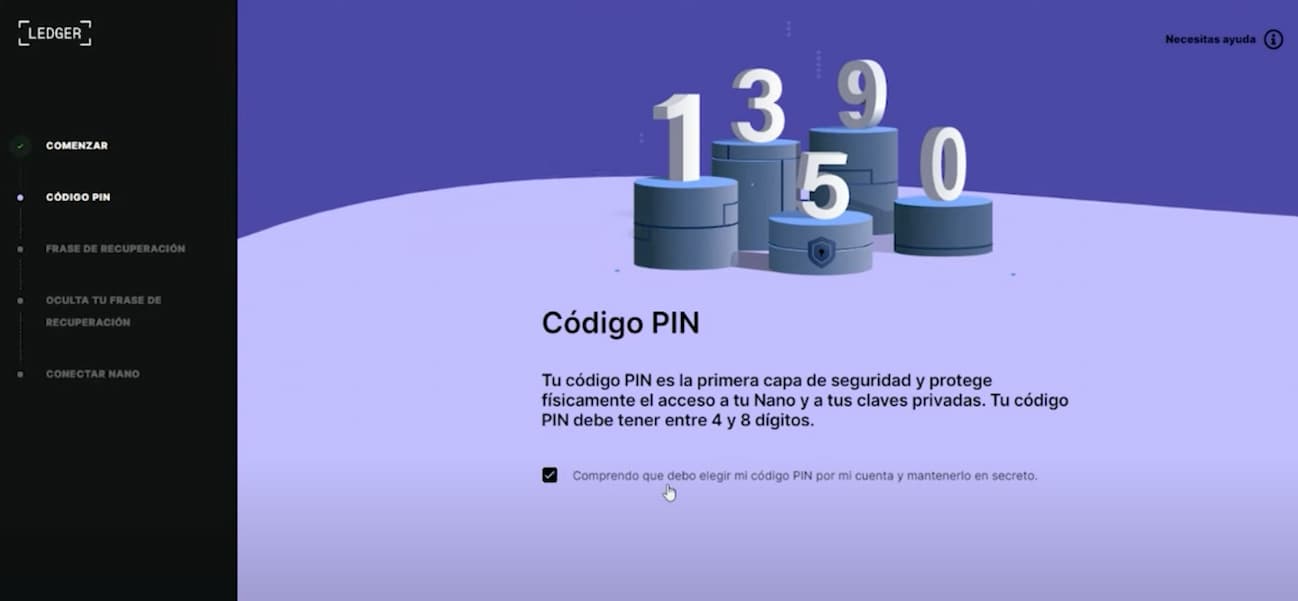
Step 4: Set up a PIN:
Create a unique PIN for your physical wallet. Make sure it is strong enough that only you can remember it.

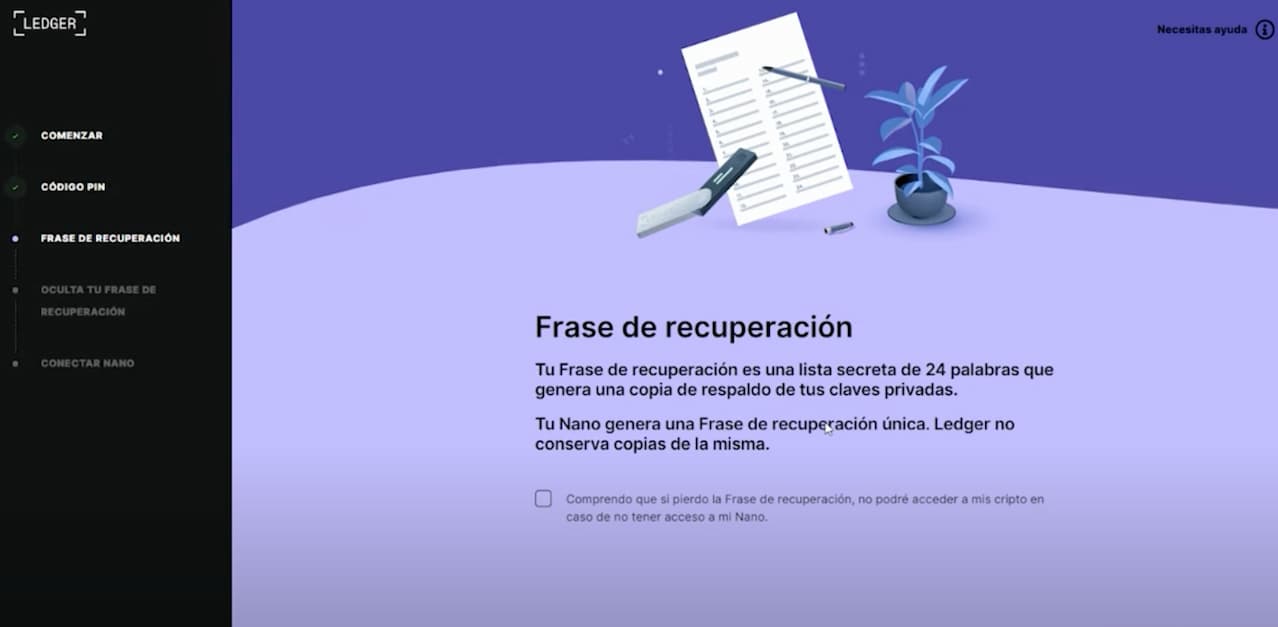
Step 5: Copy your keyword phrase:
The physical wallet will generate a 24-word recovery phrase. Write this phrase down on paper and keep it in a safe place away from prying eyes.

Step 6: Verify your seed phrase:
To make sure you copied the seed phrase correctly, the physical wallet will ask you to enter some words in order. Double check and make sure they match.
Step 7: Set up your wallet:
Follow the on-screen instructions in the app or software to set up your wallet. You can add different cryptocurrencies and manage your funds from there.
Step 8: Execute a test transaction:
To make sure everything is working properly, perform a small test transaction. Make sure you can send and receive money smoothly.
Step 9: Update regularly:
Make sure your hardware wallet app or software is updated with the latest security updates. These updates are essential to protect your cryptocurrencies from potential security vulnerabilities.
Step 10: Store your physical wallet in a safe place:
Once you have created the wallet, store it in a safe and secure place. Keep it away from any potential physical damage and avoid exposing it to extreme temperatures.
Do I need a software wallet if I have a hardware wallet?
A physical wallet is the best option for storing most of your cryptocurrencies, as it keeps your private keys offline and protects your funds safely. Only connect your physical wallet when you need to make transactions.
However, you can also get a software wallet to quickly access your cryptocurrencies from any device connected to the internet. Use it only for daily transactions or to store small amounts.
Basically, if you are interested in trading, you will most likely have both; but if you prefer to hold for the long term, a physical wallet is the safer option.
If you have a software wallet, make sure to protect it with strong passwords and enable all available security measures. Most of your funds should be in the physical wallet, and use the software wallet only for convenience and online payments.
How does a non-electronic wallet work?
Since they are not electronic, you don’t need to configure anything at all. They are easy to use, and some, like Material Cold wallets, are extremely resistant.

So, how do you store cryptocurrencies in one of these hardware wallets?
- Access your exchange.
- Select “Withdraw”.
- They will ask for the destination address.
- Scan your QR code and you’re all set!
How to Withdraw Cryptocurrencies from a Hardware Wallet Like Material Bitcoin
It’s easy, and won’t even take you 5 minutes!
1. All you need is your mobile phone and computer, then download one of these two applications: Exodus or Electrum.
2. Once you have the app installed on your device, simply scan the Bitcoin Material board using the app. To do this, you will only need to enter the private key hidden behind a sticker on the board. Then, select the amount of Bitcoins you want to withdraw, and you are done!
3. The app will provide you with instructions on how to send your bitcoins to an exchange to sell them or to another bitcoin address, whichever you prefer! The entire process is straightforward and secure, allowing you to manage your crypto quickly and without hassle.
Finally:
As you can see, to set up an e-wallet like Ledger or Trezor, you need to visit their website, connect your wallet, and follow the app’s instructions. Keep in mind that you will be relying on it to be updated constantly.
On the other hand, if you choose a non-electronic wallet like a physical cold wallet, you will only need to make sure that it stays in a safe place, and will not depend on updates or configurations. You will not have to worry about physical damage, hackers, or water either. Your cryptocurrencies will remain safe.
If you have any doubts or questions, feel free to leave them in the comments!


